Solving CTF with Frida - Part 5

In this series of posts I’ll be solving some persistence challenges from hpandro ctf challenges. hpAndro created an Android application with multiple vulnerabilities, following the MSTG.
We have eleven different challenges related to root detection mechanisms. Most of the root detection validations work in the same way, so I’ll do a generic analysis of how it works and then I’ll give details on how each validation works. List of validations:
- Availability of BusyBox.
- Dangerous Properties.
- Potentially Dangerous applications.
- RootCloak available.
- RootManagement apps availables.
- RW System state.
- SafetyNet validation.
- StatSystemCall.
- Su Binaries available.
- Su exists.
- Test Keys availables.
In order to execute a validation the application does the following:
a) Validate the state of the cellphone at start in order to check if the control have to be bypassed to get the flag. As an example in the RootManagement apps exercise the application validates if there is any RootManagement app in the cellphone. If there is none, the exercise would not have any sense because the flag would be retrieved without doing anything. So the application checks this, and if the control is not bypasseable, the application will launch an error whenever the user wants to execute the exercise (we’ll check this later on)
b) Whenever the Task is executed, and a button of ROOT CHECK is pressed, the application execues the validation and if the service returns true, the flag is retrieved from the service.
Step a
Whenever the application starts up, the com.hpandro.androidsecurity.ui.activity.SplashActivity is called. The method onCreate has the following code:
@Override
    public void onCreate(Bundle bundle) {
        super.onCreate(bundle);
        setContentView(R.layout.activity_splash);
        rootDetection();
If we check what the rootDetection method does, we’ll see that it executes the same control that is then executed on each exercise and calls checkRootFlag:
public final void rootDetection() {
    BaseActivity baseActivity = this;
    checkRootFlag(SharedPrefsConst.PREF_RootManagementApps, RootDetectionUtils.Companion.checkFlagRootManagementApps(baseActivity));
    checkRootFlag(SharedPrefsConst.PREF_PotentiallyDangerousApps, RootDetectionUtils.Companion.checkFlagPotentialDangerousApps(baseActivity));
    checkRootFlag(SharedPrefsConst.PREF_TestKeys, RootDetectionUtils.Companion.checkFlagTestKeys());
    checkRootFlag(SharedPrefsConst.PREF_DangerousProps, RootDetectionUtils.Companion.checkFlagDangerousProps());
    checkRootFlag(SharedPrefsConst.PREF_BusyBoxBinary, RootDetectionUtils.Companion.checkFlagBusyBoxBinaries());
    checkRootFlag(SharedPrefsConst.PREF_SuBinary, RootDetectionUtils.Companion.checkFlagSUBinaries());
    checkRootFlag(SharedPrefsConst.PREF_SuExists, RootDetectionUtils.Companion.checkFlagSUExists());
    checkRootFlag(SharedPrefsConst.PREF_RootCloakingApps, RootDetectionUtils.Companion.checkFlagRootClockingApps(baseActivity));
    checkRootFlag(SharedPrefsConst.PREF_RWSystem, RootDetectionUtils.Companion.checkFlagRWSystems());
    checkRootFlag(SharedPrefsConst.PREF_StatSystemcall, RootDetectionUtils.Companion.checkRunningProcesses(baseActivity));
    SharedPreferences sharedPreferences2 = this.sharedPreferences;
    if (sharedPreferences2 == null) {
        Intrinsics.throwUninitializedPropertyAccessException("sharedPreferences");
    }
}
The checkRootFlag stores a value in a shared preference folder, which adds an F whether the validation returns “true” or 0 in the other case:
private final void checkRootFlag(String str, boolean z) {
    String str2;
    SharedPreferences sharedPrefRootDetection = MainApp.Companion.getSharedPrefRootDetection();
    String string = sharedPrefRootDetection.getString(str + AppConstant.pref, "00");
    if (z) {
        str2 = Intrinsics.stringPlus(string, "F");
    } else {
        str2 = Intrinsics.stringPlus(string, "0");
    }
    MainApp.Companion.getSharedPrefRootDetection().edit().putBoolean(str, z).apply();
    SharedPreferences.Editor edit = MainApp.Companion.getSharedPrefRootDetection().edit();
    edit.putString(str + AppConstant.pref, str2).apply();
}
If we check the shared preferences folder we see the following files:
vbox86p:/data/data/com.hpandro.androidsecurity/shared_prefs # ls -al
total 104
drwxrwx--x  2 u0_a101 u0_a101 4096 2021-07-25 12:30 .
drwx------ 10 u0_a101 u0_a101 4096 2021-07-25 12:29 ..
-rw-rw----  1 u0_a101 u0_a101  277 2021-07-24 20:09 AndroidSecurity.xml
-rw-rw----  1 u0_a101 u0_a101  949 2021-07-24 20:09 EmulatorDetection.xml
-rw-rw----  1 u0_a101 u0_a101  188 2021-07-24 20:09 FirebaseAppHeartBeat.xml
-rw-rw----  1 u0_a101 u0_a101   65 2021-07-25 12:30 GTPlayerPurchases.xml
-rw-rw----  1 u0_a101 u0_a101   65 2021-07-25 12:30 OneSignal.xml
-rw-rw----  1 u0_a101 u0_a101   65 2021-07-25 12:30 OneSignalTriggers.xml
-rw-rw----  1 u0_a101 u0_a101 1066 2021-07-24 20:09 RootDetection.xml
-rw-rw----  1 u0_a101 u0_a101  127 2021-07-24 20:09 WebViewChromiumPrefs.xml
-rw-rw----  1 u0_a101 u0_a101  486 2021-07-24 20:09 admob.xml
-rw-rw----  1 u0_a101 u0_a101  270 2021-07-24 20:09 admob_user_agent.xml
-rw-rw----  1 u0_a101 u0_a101 1067 2021-07-25 12:29 com.google.android.gms.measurement.prefs.xml
The file being updated is RootDetection.xml. The content has the following format:
<?xml version='1.0' encoding='utf-8' standalone='yes' ?>
<map>
    <boolean name="PotentiallyDangerousApps" value="false" />
    <boolean name="StatSystemcall" value="false" />
    <string name="RootManagementAppsStr">00F</string>
    <string name="SuBinaryStr">00F</string>
    <string name="StatSystemcallStr">000</string>
    <string name="RWSystemStr">000</string>
    <boolean name="RootManagementApps" value="true" />
    <string name="SuExistsStr">00F</string>
    <boolean name="BusyBoxBinary" value="true" />
    <boolean name="RWSystem" value="false" />
    <string name="PotentiallyDangerousAppsStr">000</string>
    <string name="DangerousPropsStr">00F</string>
    <boolean name="DangerousProps" value="true" />
    <boolean name="SuBinary" value="true" />
    <boolean name="RootCloakingApps" value="false" />
    <string name="RootCloakingAppsStr">000</string>
    <string name="BusyBoxBinaryStr">00F</string>
    <boolean name="SuExists" value="true" />
    <boolean name="TestKeys" value="true" />
    <string name="TestKeysStr">00F</string>
</map>
Step b
Each control has an Activity that launches the validation which retrieves the flag in case the root detection returns false. The activity has button that generates the control:
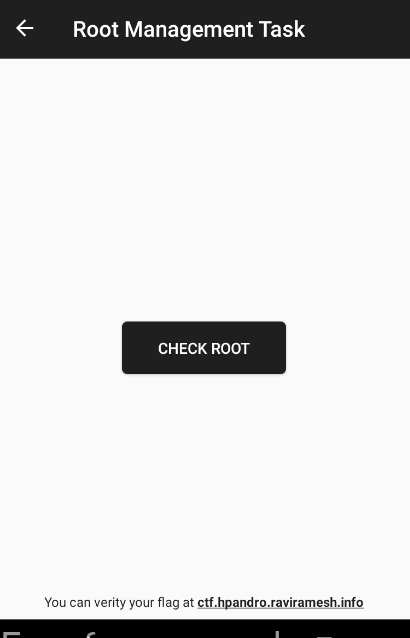
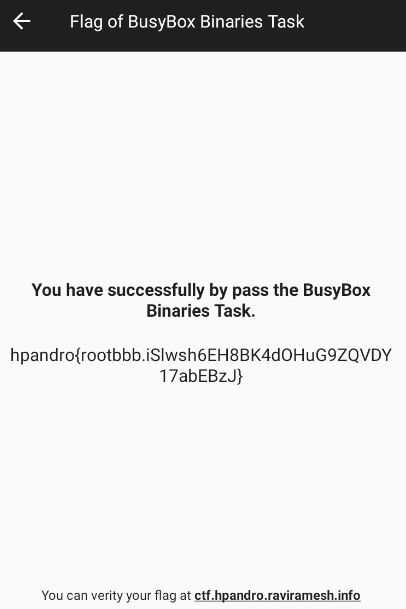
If the control is passed, the flag is returned:
and in case the control is not passed, nothing happens.
The activity calls an init method that sets the onCliCkListener of the button which will launch the validation.
@Override
public void onCreate(Bundle bundle) {
    super.onCreate(bundle);
    setContentView(R.layout.activity_X_task);
    init();
}

public final void init() {
    Toolbar toolbar = (Toolbar) _$_findCachedViewById(R.id.toolbarTask);
    Intrinsics.checkNotNullExpressionValue(toolbar, "toolbarTask");
    toolbar.setTitle(getString(R.string.X) + " Task");
    ((Toolbar) _$_findCachedViewById(R.id.toolbarTask)).setNavigationOnClickListener(new BusyBoxBinaryTaskActivity$init$1(this));
    ((Button) _$_findCachedViewById(R.id.btnCheRoot)).setOnClickListener(new XTaskActivity$init$2(this));
}
The button creates an instance of a Listener called like the activity, but adding an $init$2 to the end. As an example the Listener that solves the control on BusyBoxBinaryTaskActivity is called BusyBoxBinaryTaskActivity$init$2. The validation is executed in the onClick method:
public final void onClick(View view) {
    String string = MainApp.Companion.getSharedPrefRootDetection().getString("XStr", "00");
    //validatin of the root control
    boolean checkFlagBusyBoxBinaries = RootDetectionUtils.Companion.checkFlagBusyBoxBinaries();
    Intrinsics.checkNotNull(string);
    if (!StringsKt.contains$default((CharSequence) string, (CharSequence) "F", false, 2, (Object) null) || checkFlagBusyBoxBinaries) {
        //generate error
        textView2.setText(this.this$0.getString(R.string.busybox_binaries) + " detected on this location\n\n" + RootDetectionUtils.Companion.getX());
        return;
    }

    XTaskActivity.access$getPresenter$p(this.this$0).getRootDetectFlag("bbb");
}
As it can be seen two different controls are validated. The first one is related to the value on the SharedPreference set on the step 1, and the second one is related to the specific control executed on the application. We have two different scenarios to face:
- The Android OS has the condition of rooted analyzed in the Task, so the sharedPreference value will have an F, and then the RootDetectionUtils will return true in the evaluation.
In this case the function to overwrite should be the one that returns the boolean checking the status. As an example the following script was created to solve the BusyBox challenge:
Java.perform( function () {
    var RootDetectionUtils = Java.use("com.hpandro.androidsecurity.utils.rootDetection.RootDetectionUtils$Companion");
    RootDetectionUtils.checkFlagBusyBoxBinaries.implementation = function () {
        return false;
    }
});
- The Android OS does not have the condition of rooted analyzed, so the sharedPreference will not have an F and the RootDetectionUtils will return false. In the second case, the application shows an error message:
In this case there are two basic alternatives. The first one is changing the environment, so the first validation sets the sharedPreference value with “F”, or changing the validation that checks if the condition is met to execute the root detection method.
As the first condition requires chaging and installing multiple applications, I decided to patch the app to bypass the validation:
Java.perform( function () {

    var StringKt = Java.use("kotlin.text.StringsKt__StringsKt");
    StringKt.contains$default.overload('java.lang.CharSequence', 'java.lang.CharSequence', 'boolean', 'int', 'java.lang.Object').implementation = function (charSeq, charSeq2,boolZ, intI, objO) {
        if (charSeq2.toString().indexOf("F") >= 0) {
            console.log("entra");
            return true;
        }
        return this.contains$default(charSeq, charSeq2,boolZ, intI, objO);
    }
});
In this script I patched the StringsKt.contains$default method found in the XTaskActivity$init$2:
if (!StringsKt.contains$default((CharSequence) string, (CharSequence) "F", false, 2, (Object) null) || detectPotentiallyDangerousApps) {
The following validation was added:
if (charSeq2.toString().indexOf("F") >= 0) {
    console.log("entra");
    return true;
}
because this method is used in multiple places in the application, so if it is changed to return always true, it will generate errors in the app. So in order to detect if the validation is the one used in the conditional for the rootCheck, I analyzed the second parameter from the function and if it has an “F”, I return always true.
Let’s check now how the validations are done in order to understand what the applications do to detect Root mechanisms. All the controls can be found in the com.hpandro.androidsecurity.utils.rootDetection.RootDetectionUtils class:
Availability of BusyBox.
BusyBox is a software suite that provides several Unix utilities in a single executable file. It runs in a variety of POSIX environments such as Linux, Android, and FreeBSD, although many of the tools it provides are designed to work with interfaces provided by the Linux kernel. It was specifically created for embedded operating systems with very limited resources. By default busybox is not installed in default Android firmwares. So it is a reasonable to assume that if busybox is in the system, it is because someone installed it (which would require root permissions). In this case a person could bypass this control by changing the binary name from busybox to another one. The method that validates it is checkFlagBusyBoxBinaries.
public final boolean checkFlagBusyBoxBinaries() {
    return checkForBinary(RootDetectionUtils.BINARY_BUSYBOX); //"busybox"
}
It calls the checkForBunary, which validates if the binary (busybox) can be found on some paths (getPath).
public boolean checkForBinary(String str) {
    Intrinsics.checkNotNullParameter(str, "filename");
    String[] paths = getPaths();
    boolean z = false;
    for (String str2 : paths) {
        String str3 = str2 + str;
        if (new File(str2, str).exists()) {
            System.out.println((Object) (">>>>>>>> " + str3 + " binary detected!"));
            z = true;
        }
    }
    return z;
}
In this case getPath generates a String Array containing some hardcoded paths (RootDetectionUtils.suPaths) and the paths from the PATH environment variable:
public final String[] getPaths() {
    String[] strArr = RootDetectionUtils.suPaths;
    ArrayList arrayList = new ArrayList(CollectionsKt.listOf((Object[]) ((String[]) Arrays.copyOf(strArr, strArr.length))));
    String str = System.getenv("PATH");
    ...
    Object[] array2 = new Regex(":").split(str, 0).toArray(new String[0]);
    if (array2 != null) {
        String[] strArr2 = (String[]) array2;
        for (String str2 : strArr2) {
            String str3 = !StringsKt.endsWith$default(str2, "/", false, 2, (Object) null) ? str2 + '/' : "";
            if (!arrayList.contains(str3)) {
                arrayList.add(str3);
            }
        }
        Object[] array3 = arrayList.toArray(new String[0]);
        if (array3 != null) {
            return (String[]) array3;
        }
    ...
}
Dangerous Properties.
The application validates some properties set on /system/default.prop. This properties enable some features on the OS that could be dangerous. In this case the following two values are validated:
- ro.debuggable = 1 (DiskLruCache.VERSION_1) makes any application debuggable despite the value it has on the AndroidManifest.
- ro.secure = 0, allows adb to be connected with a high privilege user (like root).
These paremeters are considered dangerous, so the default Android firmwares do not set them on those values. In this case it is not easy to modify that file, because it is being recovered each time the Android firmware is restarted. Also it would disable some functionalities desired on rooted devices. The method that does this is the following one:
public final boolean checkFlagDangerousProps() {
    HashMap hashMap = new HashMap();
    hashMap.put("ro.debuggable", DiskLruCache.VERSION_1);
    hashMap.put("ro.secure", "0");
    String[] propsReader = propsReader();
    if (propsReader == null) {
        return false;
    }
    boolean z = false;
    for (String str : propsReader) {
        for (String str2 : hashMap.keySet()) {
            String str3 = str;
            if (StringsKt.contains$default((CharSequence) str3, (CharSequence) str2, false, 2, (Object) null)) {
                String str4 = '[' + ((String) hashMap.get(str2)) + ']';
                if (StringsKt.contains$default((CharSequence) str3, (CharSequence) str4, false, 2, (Object) null)) {
                    System.out.println((Object) (">>>>>>>>>>>>>>> " + str2 + " = " + str4 + " detected!"));
                    z = true;
                }
            }
        }
    }
    return z;
}
Potentially Dangerous applications.
In this case the application validates if some applications that are known to be malicious are installed in the phone. In this case the way to validate it is using the following method:
public final boolean detectPotentiallyDangerousApps(Context context, String[] strArr) {
    Intrinsics.checkNotNullParameter(context, "mContext");
    Intrinsics.checkNotNullParameter(strArr, "additionalDangerousApps");
    ArrayList arrayList = new ArrayList();
    Companion companion = this;
    String[] knownDangerousAppsPackages = companion.getKnownDangerousAppsPackages();
    arrayList.addAll(Arrays.asList((String[]) Arrays.copyOf(knownDangerousAppsPackages, knownDangerousAppsPackages.length)));
    if (!(strArr.length == 0)) {
        arrayList.addAll(Arrays.asList((String[]) Arrays.copyOf(strArr, strArr.length)));
    }
    return companion.isAnyPackageFromListInstalled(context, arrayList);
}
The application then calls the isAnyPackageFromListInstalled which checks if any package is in the cellphone by consuming the PackageManager:
private final boolean isAnyPackageFromListInstalled(Context context, List<String> list) {
    Intrinsics.checkNotNull(context);
    PackageManager packageManager = context.getPackageManager();
    Intrinsics.checkNotNullExpressionValue(packageManager, "mContext!!.packageManager");
    boolean z = false;
    for (String str : list) {
        try {
            packageManager.getPackageInfo(str, 0);
            System.out.println((Object) (">>>>>> " + str + " ROOT management app detected!"));
            z = true;
        } catch (PackageManager.NameNotFoundException unused) {
        }
    }
    return z;
}
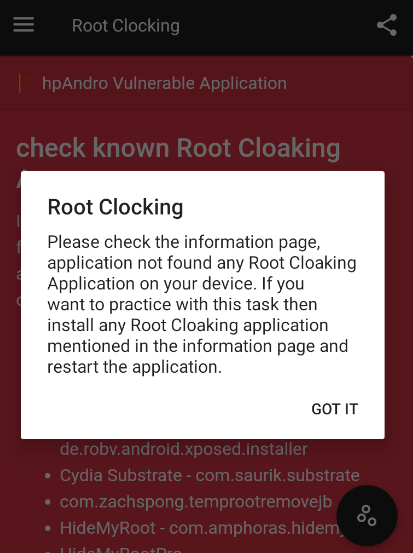
RootCloak available.
RootCloak applications are apps used to hide the fact that the phone is rooted. This is done by hooking many functionalities used in order to validate if the application is rooted, like the ones seen in this post, and changing them to avoid the validation. This can be done only if the rootcloak application has root permissions (to be able to reach all the applications).
So if the application detects any of these applications, it infers that the cellphone is rooted. This is done in a similar way as in the case of the dangerous applications, but in this case the applications being validated are related to known RootCloak applications.
RootManagement apps availables.
RootManagement apps are used for managing the permissions each application whenever it is opened. If the user wants the application to run as root, they have to select it on this app and then whenever the app is opened, it will run with high privileges.
As it happens with RootCloak applications, these must be run as a root user. So if hpAndro finds any of these apps in the cellphone installed, it will infer that the phone is rooted.
RW System state.
This validation checks the state of the mounted partitions. This is done by executing the mount command which returns something like:
tmpfs on /dev type tmpfs (rw,seclabel,nosuid,relatime,mode=755)
devpts on /dev/pts type devpts (rw,seclabel,relatime,mode=600)
proc on /proc type proc (rw,relatime,gid=3009,hidepid=2)
sysfs on /sys type sysfs (rw,seclabel,relatime)
selinuxfs on /sys/fs/selinux type selinuxfs (rw,relatime)
tmpfs on /mnt type tmpfs (rw,seclabel,nosuid,nodev,noexec,relatime,mode=755,gid=1000)
tmpfs on /apex type tmpfs (rw,seclabel,nosuid,nodev,noexec,relatime,mode=755)
/dev/block/sda4 on / type ext4 (ro,seclabel,nodev,noatime,block_validity,delalloc,barrier,user_xattr)
none on /dev/blkio type cgroup (rw,nosuid,nodev,noexec,relatime,blkio)
none on /dev/cpuctl type cgroup (rw,nosuid,nodev,noexec,relatime,cpu)
none on /acct type cgroup (rw,nosuid,nodev,noexec,relatime,cpuacct)
none on /dev/cpuset type cgroup (rw,nosuid,nodev,noexec,relatime,cpuset,noprefix,release_agent=/sbin/cpuset_release_agent)
none on /dev/memcg type cgroup (rw,nosuid,nodev,noexec,relatime,memory)
none on /dev/stune type cgroup (rw,nosuid,nodev,noexec,relatime,schedtune)
The application parses the output of that command, and checks if any of the common partitions android has has a rw status. That could mean that the OS was modified in order to change the default status from the partitions, and this can be done only if the owner of the phone or emulator has a root user to remount the default partitions.
This is done with the following code:
public final boolean checkFlagRWSystems() {
    ...
    String[] mountReader = companion2.mountReader();
    int i2 = 0;
    if (mountReader == null) {
        return false;
    }
    int i3 = Build.VERSION.SDK_INT;
    int length = mountReader.length;
    int i4 = 0;
    boolean z = false;
    while (i4 < length) {
        String str3 = mountReader[i4];
        Object[] array = new Regex(" ").split(str3, i2).toArray(new String[i2]);
        if (array != null) {
            ...
                String[] pathsThatShouldNotBeWritable = companion2.getPathsThatShouldNotBeWritable();
                int length2 = pathsThatShouldNotBeWritable.length;
                String str4 = str2;
                int i6 = 0;
                while (i6 < length2) {
                    String str5 = pathsThatShouldNotBeWritable[i6];
                    ...
                        if (StringsKt.equals(strArr3[i7], "rw", true)) {
                            System.out.println((Object) (str5 + " path is mounted with rw permissions! " + str3));
                            z = true;
                            break;
                        }
                        i7++;
                        mountReader = strArr;
                        strArr3 = strArr3;
                        i3 = i;
                    ...
SafetyNet validation.
SafetyNet from Google offers a complete suite of features to keep the Android ecosystem in check. The set of services and APIs from SafetyNet are focused on safety which when tied with an application opens up a new realm to safeguard the app against security threats. SafetyNet Attestation API – Checks whether the gadget the application is attempting to run on is tampered or potentially compromised. It compares the device’s profile with that of Google certified devices and verifies if the device or the software running on it is Android compatible.
The API verifies the following:
- Whether the device is rooted or not.
- Whether the device is monitored.
- Whether the bootloader has been unlocked.
- Whether the device has recognized hardware parameters.
- Whether the software is Android compatible.
- Whether the device is free form malicious apps.
In order to execute the call to the SafetyNet servers, hpAndro executes the following code in the com.hpandro.androidsecurity.ui.activity.task.rootDetection.SafetyNetTaskActivity class:
public final void sendSafetyNetRequest() {
    byte[] requestNonce = getRequestNonce("Safety Net Sample: " + System.currentTimeMillis());
    Intrinsics.checkNotNull(requestNonce);
    SafetyNetTaskActivity safetyNetTaskActivity = this;
    SafetyNetClient client = SafetyNet.getClient((Activity) safetyNetTaskActivity);
    Intrinsics.checkNotNullExpressionValue(client, "SafetyNet.getClient(this@SafetyNetTaskActivity)");
    Task<SafetyNetApi.AttestationResponse> attest = client.attest(requestNonce, "AIzaSyAampEGuuEzC5zW0Wvd3cjx8uWkVfd8O4Y");
    Intrinsics.checkNotNullExpressionValue(attest, "client.attest(nonce, \"AI…C5zW0Wvd3cjx8uWkVfd8O4Y\")");
    attest.addOnSuccessListener(safetyNetTaskActivity, this.mSuccessListener).addOnFailureListener(safetyNetTaskActivity, this.mFailureListener);
}
StatSystemCall.
In this case the validation used is identical to the one related to the RWSystem validation:
public final void onClick(View view) {
    String string = MainApp.Companion.getSharedPrefRootDetection().getString("StatSystemcallStr", "00");
    boolean checkFlagRWSystems = RootDetectionUtils.Companion.checkFlagRWSystems();
    Intrinsics.checkNotNull(string);
    if (!StringsKt.contains$default((CharSequence) string, (CharSequence) "F", false, 2, (Object) null) || checkFlagRWSystems) {
        ...
    }
    StatSystemCallTaskActivity statSystemCallTaskActivity = this.this$0;
    ...
    StatSystemCallTaskActivity.access$getPresenter$p(this.this$0).getRootDetectFlag("rpro");
}
Su Binaries available.
The control in this section is like the one of Dangerous Applications, but in this case what is being validated is the existence of the su binary.
Su exists.
This control also validates the existence of su. But instead of searching in the path for the binary, it executes the which command in order to see whether the os returns any location where the su is found:
public final boolean checkFlagSUExists() {
    Process process = null;
    boolean z = false;
    try {
        process = Runtime.getRuntime().exec(new String[]{"/system/xbin/which", "su"});
        Intrinsics.checkNotNullExpressionValue(process, "process");
        if (new BufferedReader(new InputStreamReader(process.getInputStream())).readLine() != null) {
            z = true;
        }
    } catch (Throwable unused) {
    }
    process.destroy();
    return z;
}
Test Keys availables.
Verifies if the Build.TAGS variable has the following value: “test-keys”.
public final boolean checkFlagTestKeys() {
    String str = Build.TAGS;
    if (str == null || !StringsKt.contains$default((CharSequence) str, (CharSequence) "test-keys", false, 2, (Object) null)) {
        return false;
    }
    return true;
}
This property is generated when the OS is built. The keys are used to sign all the system applications whenever the firmware is packed. These applications are being included in the /system/app folder generally and runs with the “system” user. Whenever the Android image is built, if any of the keys found in “build/target/product/security” is used, the system sets the Build.TAGS variable with test-keys.
As these kets are public, it is not recommended to use it to sign any application, as an attacker could generate an “updated” application (it would be valid because of the use of the system keys) with a malicious payload, which in case it were installed would run as a priviledged user.
If the key used is valid but not the ones publicly available, whenever the app signing step is executed, the Build.TAGS parameter will have the value “release-keys”.
Conclusion
The controls shown in this application are commonly seen in production applications. As pentesters, it is important to understand them in order to find patterns in the applications we are analyzing to try to detect these controls and patch them in order to continue with the security analysis of the target. As a developer it is good to know how the controls work and how an attacker could try to bypass them.