Solving CTF with Frida - Part 2

In this series of posts I’ll be solving the hpandro ctf challenges. hpAndro created an Android application with multiple vulnerabilities, following the MSTG.
This application has a lot of simple challenges, so it is good for beginners or to test some techniques. I’ll try to solve all the challenges using Frida. As a secondary objective I’ll try to use scripts that can work in multiple scenarios and not just to get the flag.
In this post we continue solving issues of hpAndro with Frida. We have three different challenges to solve:
- Intercept HTTPS traffic.
- Intercept TCP traffic.
- Intercept UDP traffic.
Intercept HTTPS traffic
Whenever we have an application with https traffic (luckily nowadays most of them have https instead of http), we have to do some extra steps in order to intercept the traffic, as in most scenarios the application won’t recognize the Web Proxy root certificate as a trusted one.
-
The first option is installing the certificate in the cellphone as a user certificate. This will work only in an Android OSs with API level 23 or lower. So if the application is compatible with older versions of Android and you have an old cellphone or VM, you could try to test it in that environment.
-
With API 24 and above, Android added the Network Security Configuration feature which lets the developer customize the network security settings of the application in a safe, declarative configuration file without modifying app code. (see https://developer.android.com/training/articles/security-config). By default applications do not trust user certificates. Generally speaking in a release version of an app it is weird to see the user certificates configuration. So there are 3 alternatives.
a- Install the web proxy certificate as a system cert. This can only be done for rooted devices as the user needs to have those rights to set the system partition as read/write. I will not cover those steps here, because this is already documented in many places.
One of the advantages of this approach is that you do it once, and unless you change the device or the proxy, it will work for all the applications you install on it. Other advantage is that you do not need to change the application.
b- Modify the application in order to set the network security configuration to accept user certificates. This alternative requires to decompile and recompile the application, so it might be cumbersome in modern application because some tools that unpacks and repacks the applications throw errors in them. I tend to avoid this approach unless it is strictly neccesary.
c- Using Frida. I’ve already covered different strategies and scripts in previous posts: Network security bypass 2 and Network security bypass.
One of the first things I do when I start the analysis of an application is checking the AndroidManifest to get an idea of the permissions the application requests, the exposed components and the network security configuration. In this case I’ll check just the third as it is needed to solve the challenge:
AndroidManifest.xml:
<application android:theme="@style/AppTheme" android:label="@string/app_name" android:icon="@mipmap/ic_launcher" android:name="com.hpandro.androidsecurity.MainApp" ... *android:networkSecurityConfig="@xml/network_security_config"* ...>
As the application tag has the attribute android:networkSecurityConfig, I need to check the file that is defined as the value of that attribute. In this case it is res/xml/network_security_config.xml:
<?xml version="1.0" encoding="utf-8"?>
<network-security-config>
    <domain-config cleartextTrafficPermitted="true">
        <domain includeSubdomains="true">hpandro.raviramesh.info
        </domain>
        <domain includeSubdomains="true">raviramesh.info
        </domain>
        <domain includeSubdomains="true">hpandro.me
        </domain>
        <trust-anchors>
            <certificates src="system"/>
            <certificates src="user"/>
        </trust-anchors>
    </domain-config>
</network-security-config>
So in this case for the following domains, the application accepts user certificates:
- hpandro.raviramesh.info
- raviramesh.info
- hpandro.me
I still need to check what does the application in the challenge. If the request is to one of the previous domains, the proxy configuration will work without doing anything else.
The activity called in the task can be seen in the AndroidManifest.xml as well:
<activity android:name="com.hpandro.androidsecurity.ui.activity.task.trafficanalysis.HTTPsTrafficActivity"/>
Whenever I navigate to the class defined in the manifest and read the code in the onCreate function I see the following URL:
if (z) {
    WebView webView4 = (WebView) y(R.id.webviewTask);
    g.c(webView4);
    webView4.loadUrl("https://hpandro.raviramesh.info/https_task.php");
}
So in this case the challenge could be solved easily, but as our objective is to solve the challenge with Frida, we’ll have to create an script and retrieve the flag with it.
By reading the content of the challenge I realized that the code is exactly the same as in the HTTPTrafficActivity, so the only change needed is to change the URL on the script. The final script is the following one:
function readNewStream(inputStream) {

    var BufferedReader = Java.use('java.io.BufferedReader');
    var InputStreamReader = Java.use('java.io.InputStreamReader');
    var inputStreamReader = InputStreamReader.$new(inputStream);

    var r = BufferedReader.$new(inputStreamReader);

    var StringBuilder = Java.use('java.lang.StringBuilder');
    var total = StringBuilder.$new();
    var String = Java.use('java.lang.String');
    while (true) {
        var line = r.readLine();
        if (line == null) {
            break;
        } else {
            total.append(line).append(String.$new('\n'));
        }
    }
    console.log(total.toString());
}

Java.perform( function () {

    var WebViewClient = Java.use('v0.d.a.c.a.d.h.b');
    WebViewClient.shouldInterceptRequest.overload('android.webkit.WebView', 'android.webkit.WebResourceRequest').implementation = function (webView, request) {

        var WebResourceResponse = Java.use('android.webkit.WebResourceResponse');
        var isFavicon = request.getUrl().toString().search("favicon.ico") > 0;

        var URL = Java.use('java.net.URL');
        var url = URL.$new(request.getUrl().toString());

        var HttpURLConnection = Java.use('java.net.HttpURLConnection');
        var urlConnection = Java.cast(url.openConnection(),HttpURLConnection);

        var String = Java.use('java.lang.String');
        urlConnection.setRequestProperty(String.$new("User-Agent"), String.$new("hpAndro"));

        var BufferedInputStream = Java.use('java.io.BufferedInputStream');
        var inputStr = BufferedInputStream.$new(urlConnection.getInputStream());
        var webResourceRes = null;
        if (!isFavicon) {
            readNewStream(inputStr);
            var map = urlConnection.getHeaderFields();
            var iter = map.entrySet().iterator();

            var Entry = Java.use('java.util.Map$Entry');
            while(iter.hasNext()) {
                var entry = Java.cast(iter.next(),Entry);
                console.log("Key : " + entry.getKey() + " ,Value : " + entry.getValue());
            }

            webResourceRes = WebResourceResponse.$new("text/html","utf-8", inputStr);
        } else {
            webResourceRes = WebResourceResponse.$new("image/vnd.microsoft.icon","gzip", inputStr);
        }

        return webResourceRes;
    }
});
Intercept TCP traffic.
As we have non HTTP Traffic, web proxies do not work here. In this case a lower level of sniffer is needed (like wireshark or tcpdump). As the objective is to solve this challenge with Frida, we need to find out how the TCP packets are being sent. We start by searching in the AndroidManifest the activity that generates the communication:
<activity android:name="com.hpandro.androidsecurity.ui.activity.task.nonhttptraffic.TCPTrafficActivity"/>
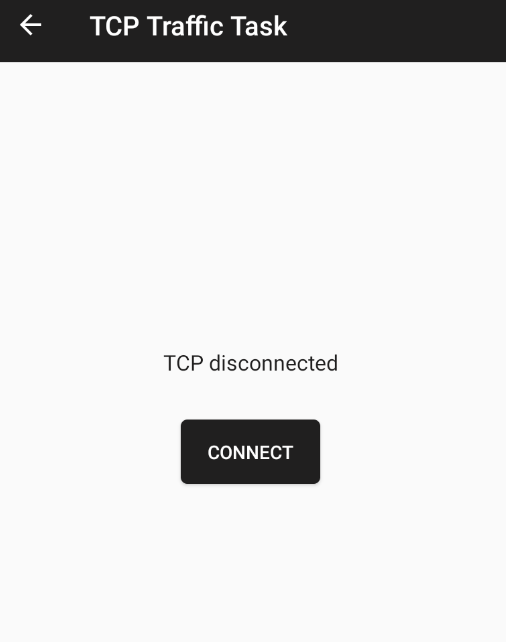
We then check the TCPTrafficActivity, and analyze the code of the onCreate method. Note that by using the application we see that the packet seems to be sent whenever the user clicks the button CONNECT:
So we want to check what the onClickListener does in that case. We can find it in the following code in the onCreate method:
onCreate()
    ((Button) y(R.id.btnConnectTCP)).setOnClickListener(new d(this));
We then check d, a class that implement OnClickListener:
public static final class d implements View.OnClickListener {
    public final /* synthetic */ TCPTrafficActivity e;

    public d(TCPTrafficActivity tCPTrafficActivity) {
        this.e = tCPTrafficActivity;
    }

    public final void onClick(View view) {
        ...
    }
}
Whenever the user clicks the button, the onClick method from the OnCLickListener is being called, so we have to analyze that method.
public final void onClick(View view) {
    this.e.t = new Thread(new b());
    Thread thread = this.e.t;
    g.c(thread);
    thread.start();
}
which basically instantiates b (an implementation of Runnable) and executes it. We’ll do a review of the method run:
public void run() {
    try {
        ...
        // socket created with the folling domain and port
        //    public final String w = "hpandro.raviramesh.info";
        //    public final int x = 65000;

        tCPTrafficActivity.s = new Socket(tCPTrafficActivity2.w, tCPTrafficActivity2.x);

        //sets a buffer reader with the InputSttram from a socket in attribute b of the TCPTrafficActivity instance
        tCPTrafficActivity4.v = new BufferedReader(new InputStreamReader(socket2.getInputStream()));
        //run a new thread with a Runnable class (a)
        new Thread(new a()).start();
    } catch (IOException e2) {
        try {
            e2.printStackTrace();
        } catch (IOException e3) {
            e3.printStackTrace();
        }
    }
}
We check the implementation of the class a that is in the same file as TCPTrafficActivity:
public void run() {
    BufferedReader bufferedReader;
    while (true) {
        try {
            //v is the bufferreader that takes the InputStream from the socket
            bufferedReader = TCPTrafficActivity.this.v;
            g.c(bufferedReader);
            break;
        } catch (IOException e2) {
            e2.printStackTrace();
        }
    }
    //in this line the bufferReader retrieves the content of the socket, and does nothing with it
    if (bufferedReader.readLine() != null) {
So in this case in order to solve the issue we could override the method readLine from BufferReader in order to show the content of the flag. The following script was created to solve it:
Java.perform( function () {
    var BufferedReader = Java.use("java.io.BufferedReader");
    BufferedReader.readLine.overload().implementation = function () {
        var line = this.readLine();
        console.log(line);
        return line;
    }
});
Intercept UDP traffic.
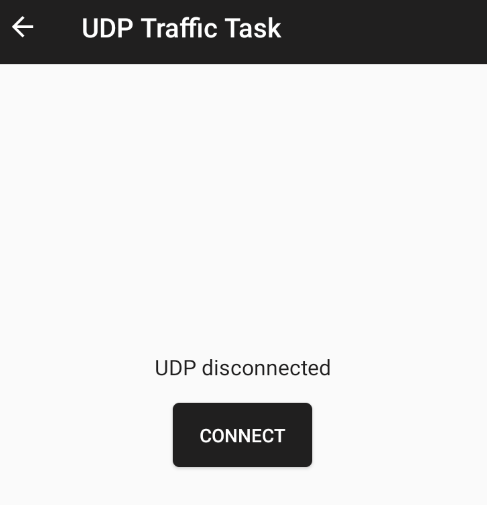
The process to solve this challenge is like the last one, so I’ll focus on the analysis of the source code. The following image is taken from the UDP taks:
We check the onCreate method to find the implementation of the OnCLickListener:
((Button) y(R.id.btnConnectUDP)).setOnClickListener(new a(1, this));
In the “a” class we have the following code:
public final void onClick(View view) {
    int i = this.e;
    if (i == 0) {
        ((UDPTrafficActivity) this.f).finish();
    } else if (i == 1) {
        ...
        //this is the handler that receives the answer in UDPTrafficActivity
        ((UDPTrafficActivity) this.f).s = new b((UDPTrafficActivity) this.f);
        b bVar = ((UDPTrafficActivity) this.f).s;
        g.c(bVar);

        //this class starts the communication and retrieves the messages
        //The application is connected to hpandro.raviramesh.info:65001
        ((UDPTrafficActivity) this.f).t = new v0.d.a.c.a.d.g.b("hpandro.raviramesh.info", 65001, bVar);
        v0.d.a.c.a.d.g.b bVar2 = ((UDPTrafficActivity) this.f).t;
        g.c(bVar2);
        bVar2.start();
    } else {
        throw null;
    }
}
We have to navigate to v0.d.a.c.a.d.g.b and see the implementation of the run method:
...
DatagramSocket datagramSocket3 = this.f;
g.c(datagramSocket3);
datagramSocket3.receive(datagramPacket2);
//data retrieved from the socket
byte[] data = datagramPacket2.getData();
g.d(data, "packet.data");
//converts byteArray to String
String str = new String(data, 0, datagramPacket2.getLength(), a.a);
UDPTrafficActivity.b bVar3 = this.e;
//bVar3.sendMessage is invoked and the String is sent as parameter
bVar3.sendMessage(Message.obtain(bVar3, 1, str));UDPTrafficActivity.b
datagramSocket = this.f;
if (datagramSocket == null) {
    return;
}
The application is using the (Message)[https://developer.android.com/reference/android/os/Message] framework that provides Android to send messages from the previous class to the AndroidActivity. So we have to check the handleMessage, and what it does with the String. The Message has the following content:
- message.what: int that identifies the kind of message sent . In this case it has the valui 1.
- message.obj: Object with the message. In this case it is the String retrieved from the socket.
The handleMessage handles the message type 1 in the following way:
UDPTrafficActivity uDPTrafficActivity2 = this.a;
Object obj2 = message.obj;
if (obj2 != null) {
    int i3 = UDPTrafficActivity.v;
    uDPTrafficActivity2.getClass();
    System.out.println((Object) ("+++++++++++++++ updateRxMsg:" + ((String) obj2)));
    uDPTrafficActivity2.runOnUiThread(new v0.d.a.c.a.d.g.a(uDPTrafficActivity2));
    return;
As it can be seen the application executes a System.out.println with the String received. If we check the logcat logs from the application we will see that the flag is printed there. So there is no need to create a Frida script to solve the challenge. Nevertheless, we’ll do it.
In this case the easiest thing is to execute a hook on the method getData of DatagramPacket:
Java.perform( function () {

    var DatagramPacket = Java.use("java.net.DatagramPacket");
    var String = Java.use("java.lang.String");
    var a = Java.use("a1.u.a");
    DatagramPacket.getData.implementation = function () {
        var data = this.getData();
        console.log(String.$new(data, 0, this.getLength(),a.a.value));
        return data;
    }
});
In the following link https://github.com/CesarMRodriguez/lunesdemobile/tree/main/Sesion%202 you can find the following content:
- https_task.js: Scrip used to solve the task of https interception.
- tcp_traffic.js: Script to solve the TCP interception task.
- udp_traffic.js: Script to solve the UDP interception task.